Installation guide
How to install your roller blind
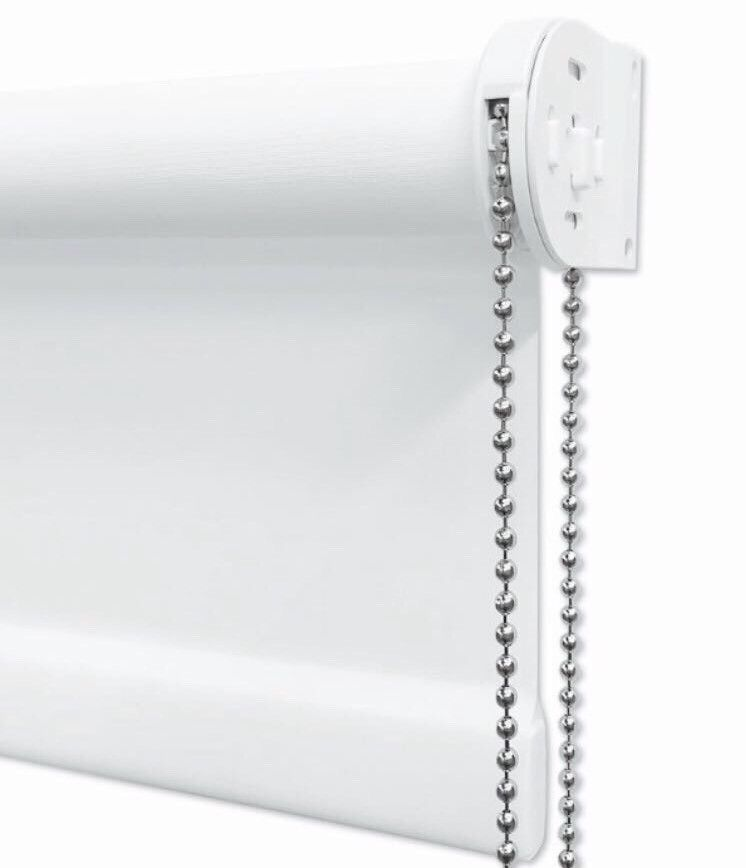
Follow these four simple steps to fit your blind. This guide covers the rounded metal brackets and chrome bead chain shown below.
Before you start
What you will need
Steel tape measure, pencil, drill and suitable drill bits, screwdriver, and fixings suitable for your mounting surface. Use a stable stepladder if needed.
Identify the two brackets
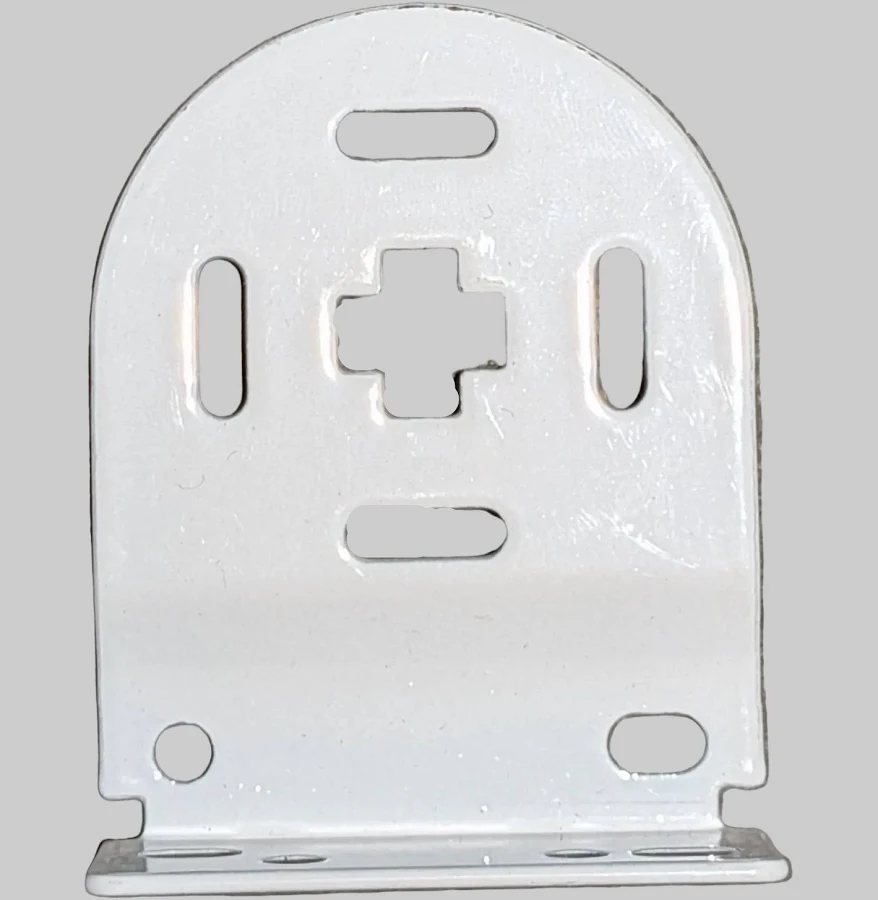
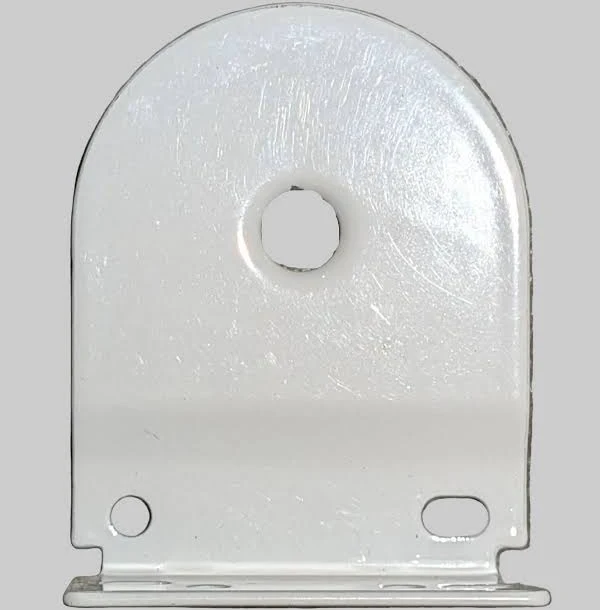
Match each bracket to its blind end. Use the fixing holes shown for your chosen mounting method.
Step 1: Choose the blind position
Inside the recess
Position the brackets within the window opening. Choose face, top or side fixing to suit the mounting surface (see Fit the brackets).
Outside the recess
Centre the blind over the window and mark the bracket positions. Then use the same fixing and hanging sequence.
Practical checks before drilling
Check for hidden pipes and cables, choose fixings for the surface, and allow clearance for handles. Install the top of the blind at least 1500 mm (150 cm) above the floor. Follow the instructions supplied with your blind.
Step 2: Fit the brackets
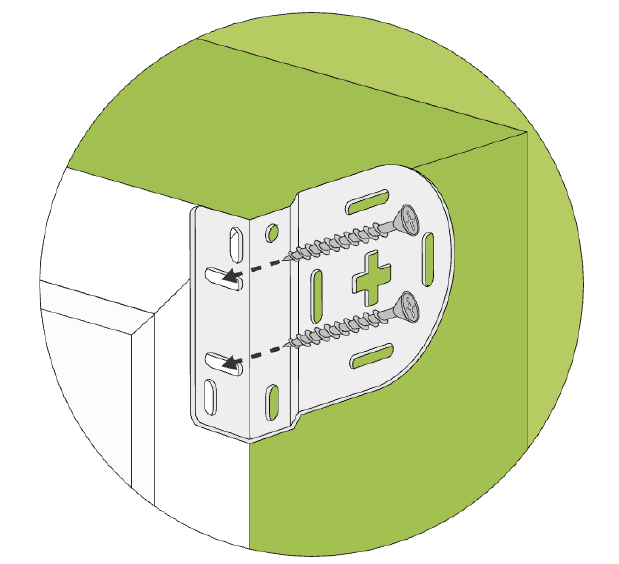
Use two suitable fixing holes in each bracket. Keep the blind sockets clear.
Hold each bracket in its intended position. Mark two suitable holes with a pencil, then drill and fit the correct fixings for the surface.
Dashed arrows show the screw direction. Drive the screws fully home to secure each bracket.
Face fix
Fix through the bracket foot into the vertical front mounting surface.
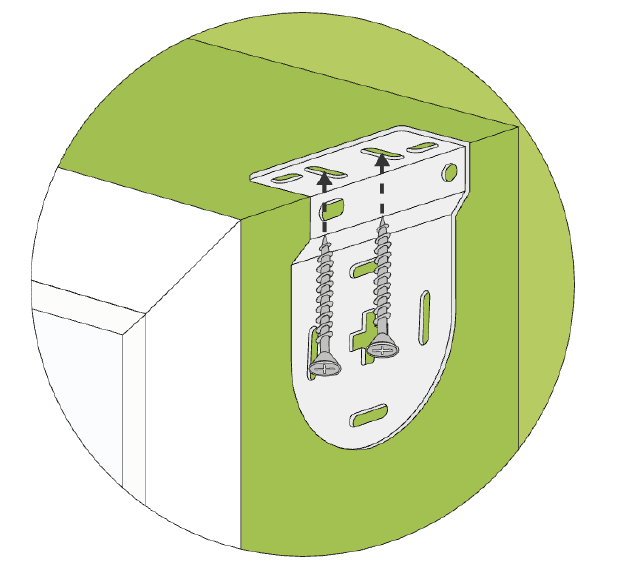
Top fix
Fix upwards through the foot into the underside of the recess or ceiling.
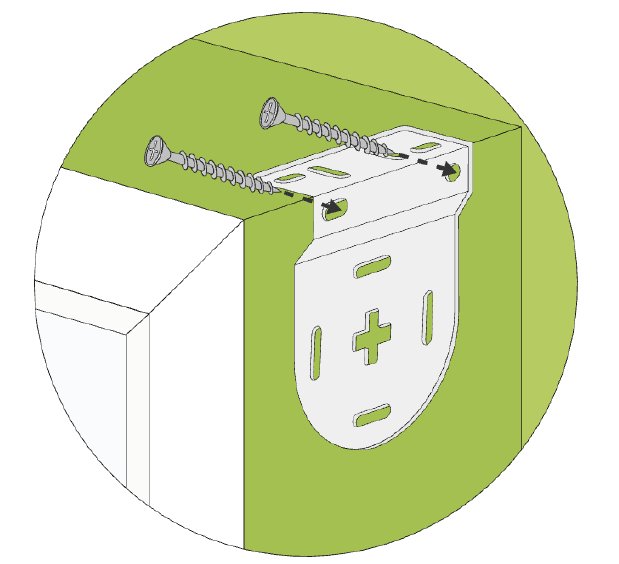
Side fix
Fix into the vertical side of the recess using the suitable holes shown.
Choose fixings for the surface
You will need to buy the appropriate screws and fixings for your mounting surface from your local hardware store.
For plasterboard fittings, we recommend a 5 mm rawl plug suitable for plasterboard and a 4.5 mm screw. These are readily available in hardware stores.
Mounting choice
We recommend top or face fixing for most installations. Use side fixing only when the blind width was measured at the very top of the recess.
Step 3: Hang the blind
Insert the spring pin first, then engage the chain-control end.
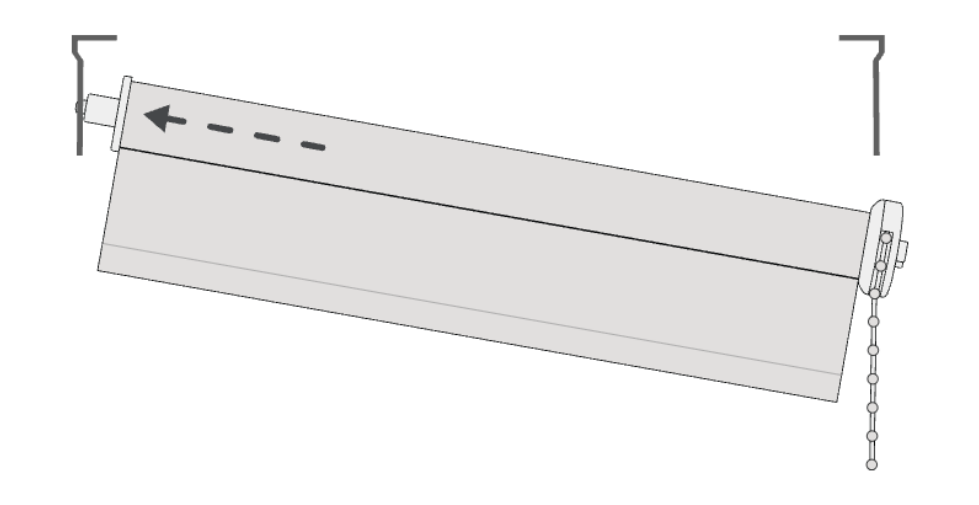
A. Insert the spring-pin end
Locate the spring-plunger pin in the round-hole bracket. Support the blind and push towards that bracket to compress the pin.
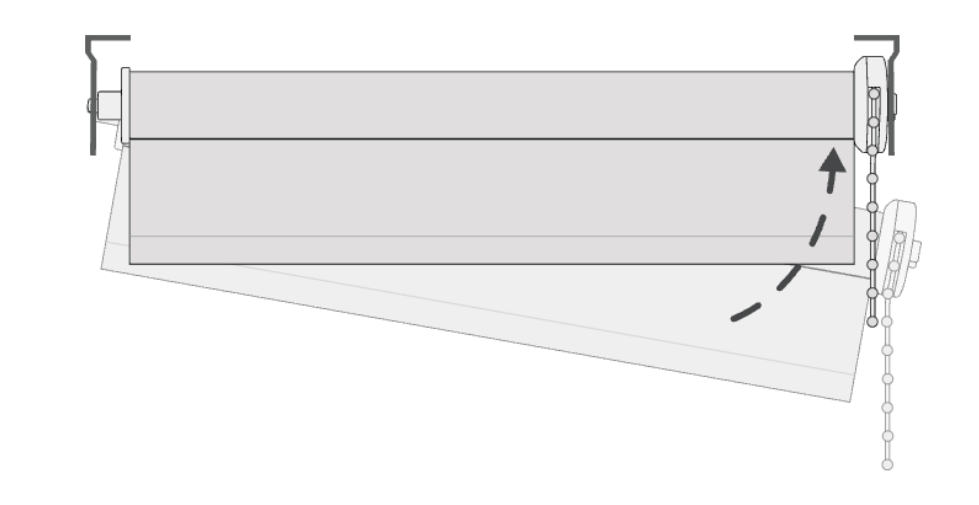
B. Lift in the control end
With the pin compressed, lift the control end and slot its rectangular lugs into the corresponding slots on the opposite bracket. Check both ends are secure.
Pin ends can be round or cross-shaped. Match the pin to its corresponding bracket and follow the instructions supplied with your blind.
Step 4: Fit the chain safety P-clip
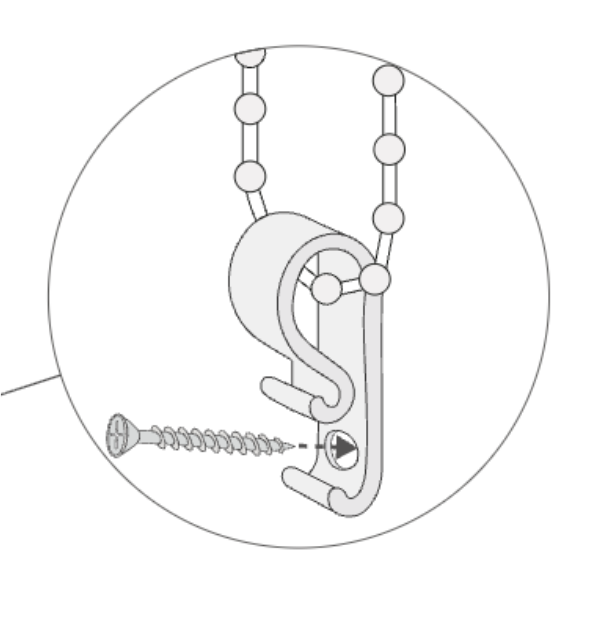
- Place the chrome chain inside the supplied P-clip as shown.
- Position the clip as far from the control mechanism as possible, keeping the chain taut while still able to move freely.
- Mark the screw hole(s), then attach the clip to the wall or recess with suitable fixings.
- Test the blind. Check the brackets stay secure and the chain moves freely through the fitted clip.
Child safety
Fit the safety device before use. Keep chains away from young children, move beds and furniture away, and do not tie chains together or allow loose loops.
Need a hand?
Email us at info@discountrollerblinds.ie and we'll help.